The content that follows provides several different examples of using the Rules Wizard to create dynamic form behavior. The sample form has also been provided, click the paper clip at the top of the page to access and download it.
| Table of Contents |
|---|
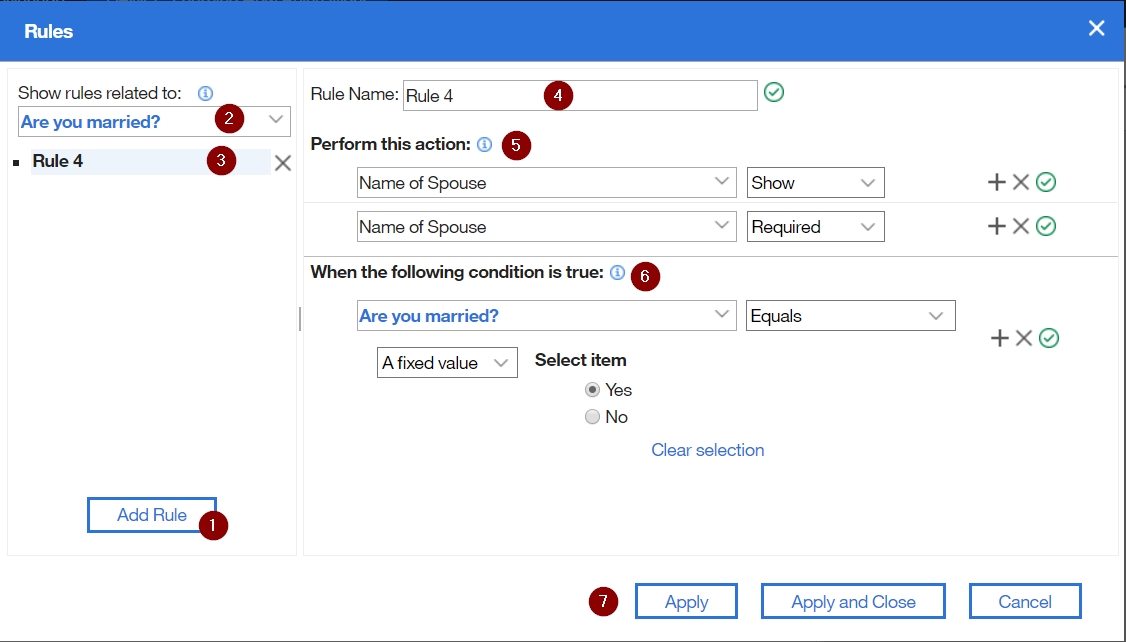
- If you want to add a new rule you must first click the Add Rule button. When the wizard loads it will default to the first rule in the list and if you make changes then you are changing that rule!
- All the rules in the form will be listed in the dropdown. When you select an item in the Show Related dropdown then all the rules that reference or affect this item will be denoted by the symbol in the diagram.
- Each rule related to the selected item will appear below the dropdown. Click the rule to see its content appear on the right side of the dialog. A rule can be deleted by clicking the “x”.
- The rule may be given a custom name by entering it into the Rule Name field
- Each Rule can perform multiple actions; hide/show, enable/disable, required/not required, valid/not valid. Note: When you define an action then the inverse is also true. For example in the above screenshot, if married equals “yes” then name of spouse will be shown which also means if married is “no” or not selected then name of spouse will be hidden.
- Every rule has a condition that must be met.
- The first dropdown contains all the form fields that can be used in a condition. If the item you want to use is on a different page, select "Show items on all pages" and then find the item.
- The second dropdown contains the valid operators which change depending on the datatype of the item you select in the first dropdown.
- The third dropdown changes the reference from a fixed value to the value of another item in the form.
- You may add more conditions by clicking the “+”
- You may only have one type of relationship between the conditions (either “AND” or “OR”)
- Apply will create the rule but leave the dialog open, Apply and Close will create the rule and close the dialog, and Cancel will close the dialog and it will not keep any changes made since the last time “Apply” was clicked or the dialog was opened. Note: If you navigate to a different rule, before applying your changes you will see a dialog.
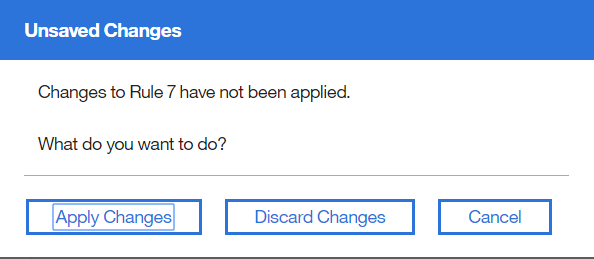
If you click “Apply Changes” then your rule modifications will be saved. If you click “Discard Changes” then any changes made will be thrown away. If you click “Cancel” then the attempt to navigate away from the current rule will be canceled.
...