How to Build Update/Tracking Style Applications
This tutorial follows a sample application called Deal Tracking that you can find here:
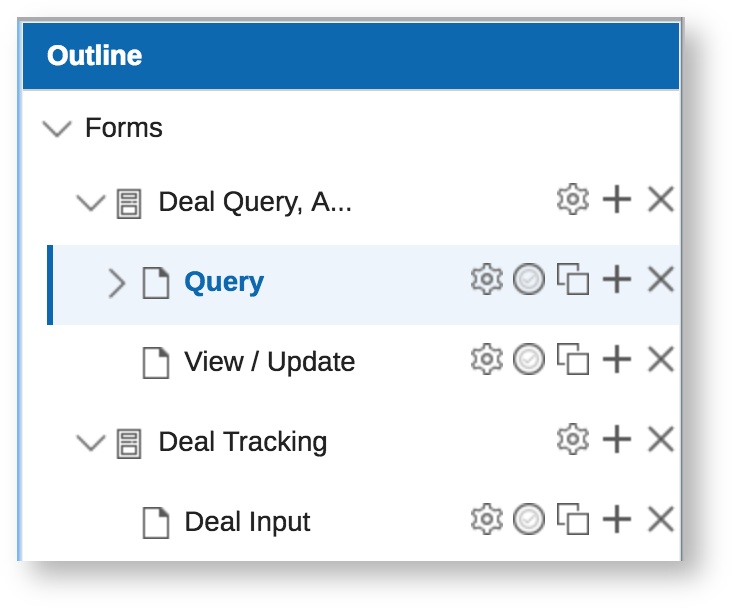
The Deal Tracking application has one Form for entering new deal opportunities and a second Form which contains the user experience and logic for querying, viewing and making changes to opportunity records that have been entered.
This pattern works well with applications like opportunity management, customer support, project tracking, sales forecasting and more. Essentially any application where you need to view and update records.
How to use a Table Like A Task List
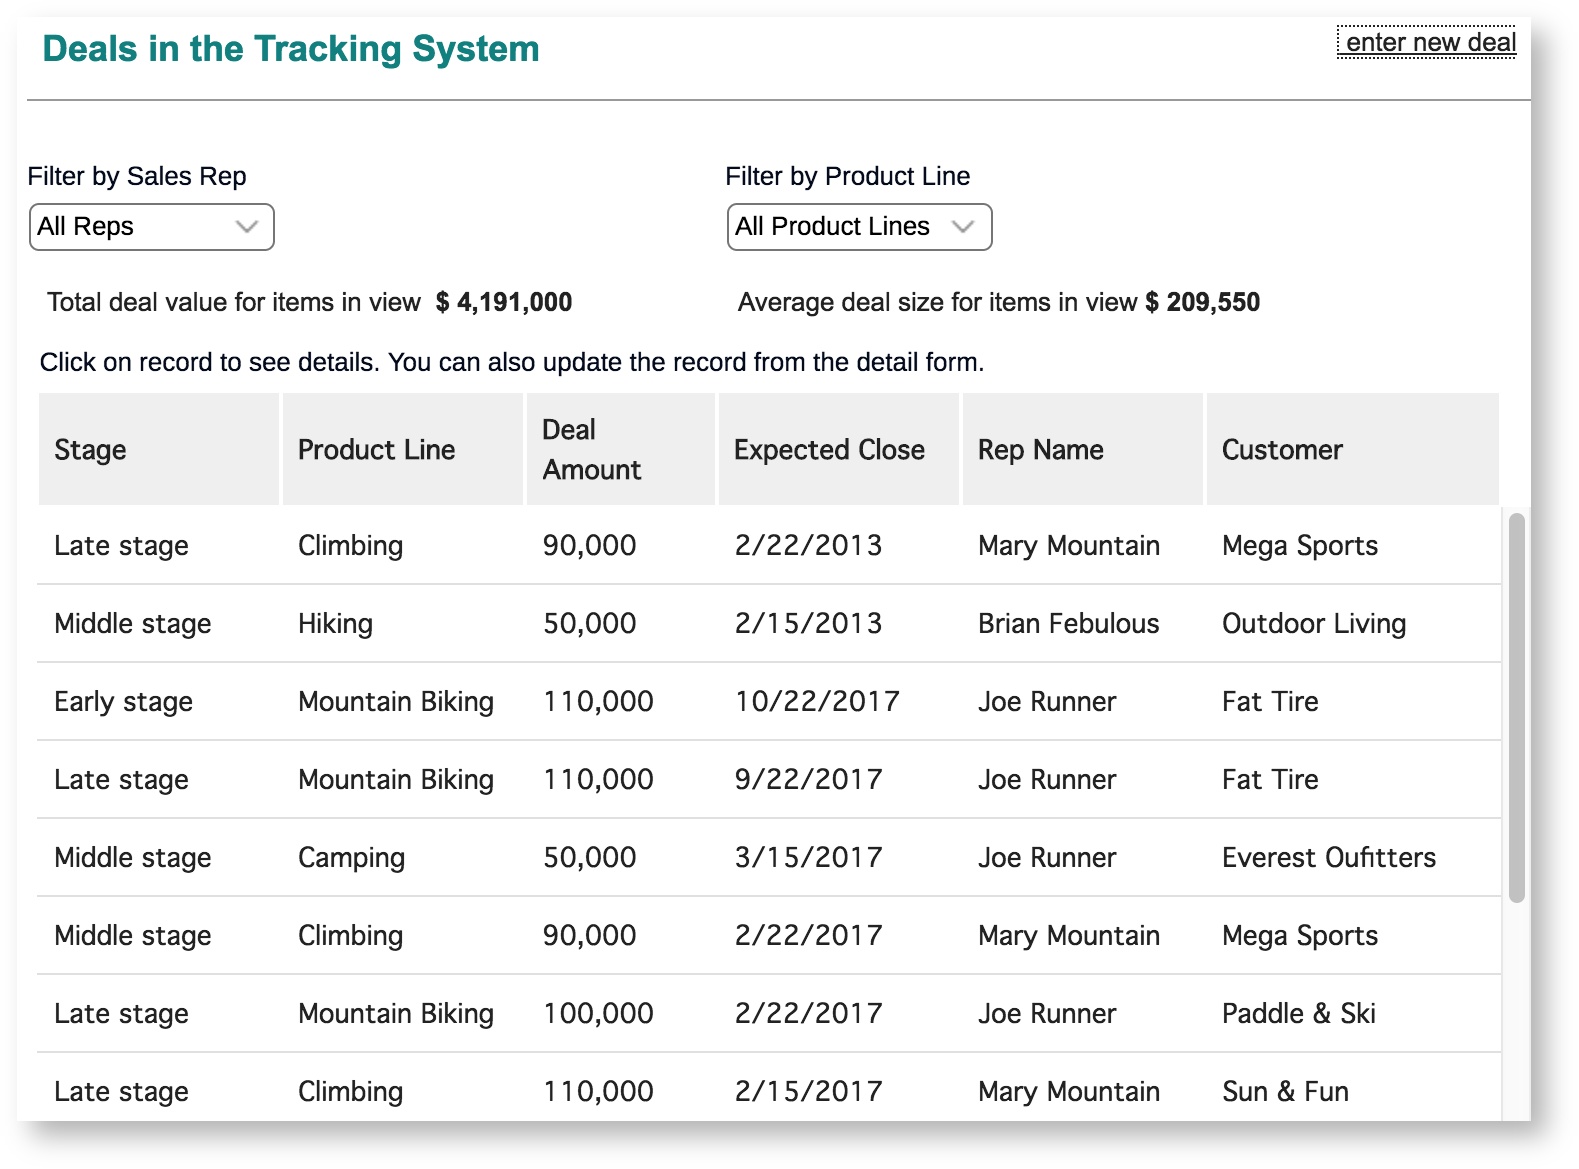
Information collected often needs to be presented in a way where you can see a summary of the data and then drill into the detail record. Using filters make the list more informative by allowing the user to zero in on the data that is of interest.
Add a Table and Populate it with Records
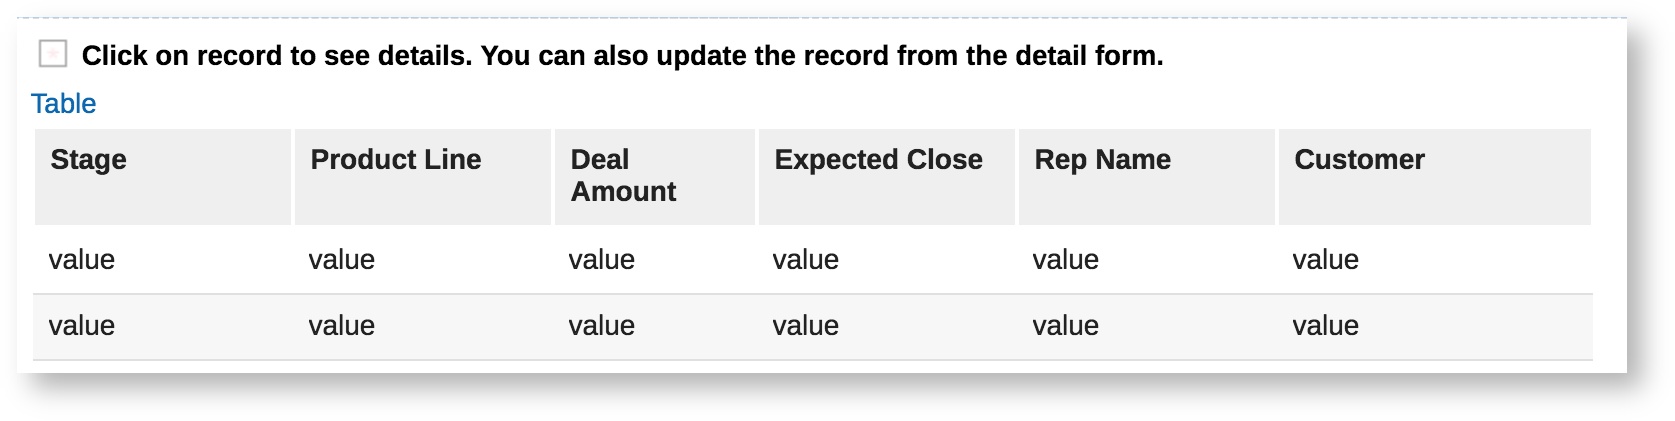
- Add a table to the page.
- Add a rule to make the table Read Only (or add item.setActive(false); to the onShow event).
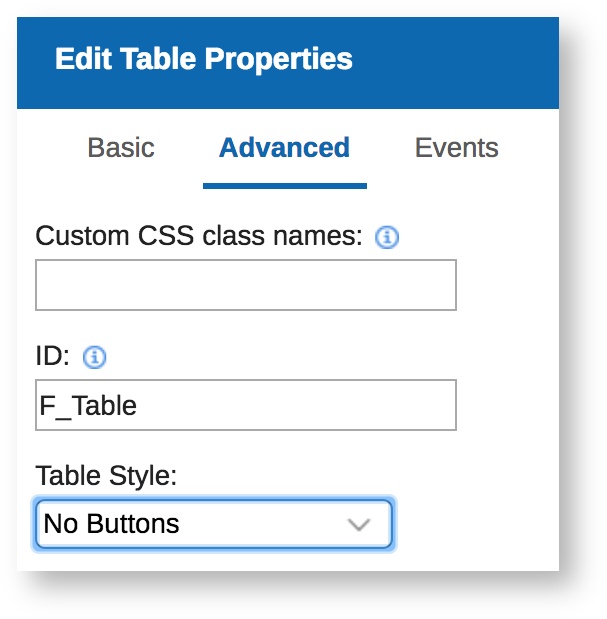
- Add the fields you want in the table. The table will be your summary list for items in the database. Include a field in the table called Record ID but do not show it in the table view (Table Properties / Advanced Tab).
- Add a service to the Deal Query form onNew event to Search another Leap application which collects records (i.e. opportunities, customer issues, etc...). Leave the Service input empty. This will pull in all records from the database into the table. Map the output of the Service to your table fields. Map the Record Unique Identifier to the Record ID field.
Add Filters to the Table
- Add one or more drops downs to the page for the fields you would like to filter on. Populate the options through a service or by typing them in.
- Go back to the search service on the Deal Query for onNew event and edit it. Map the drop down fields to their corresponding search by input fields.
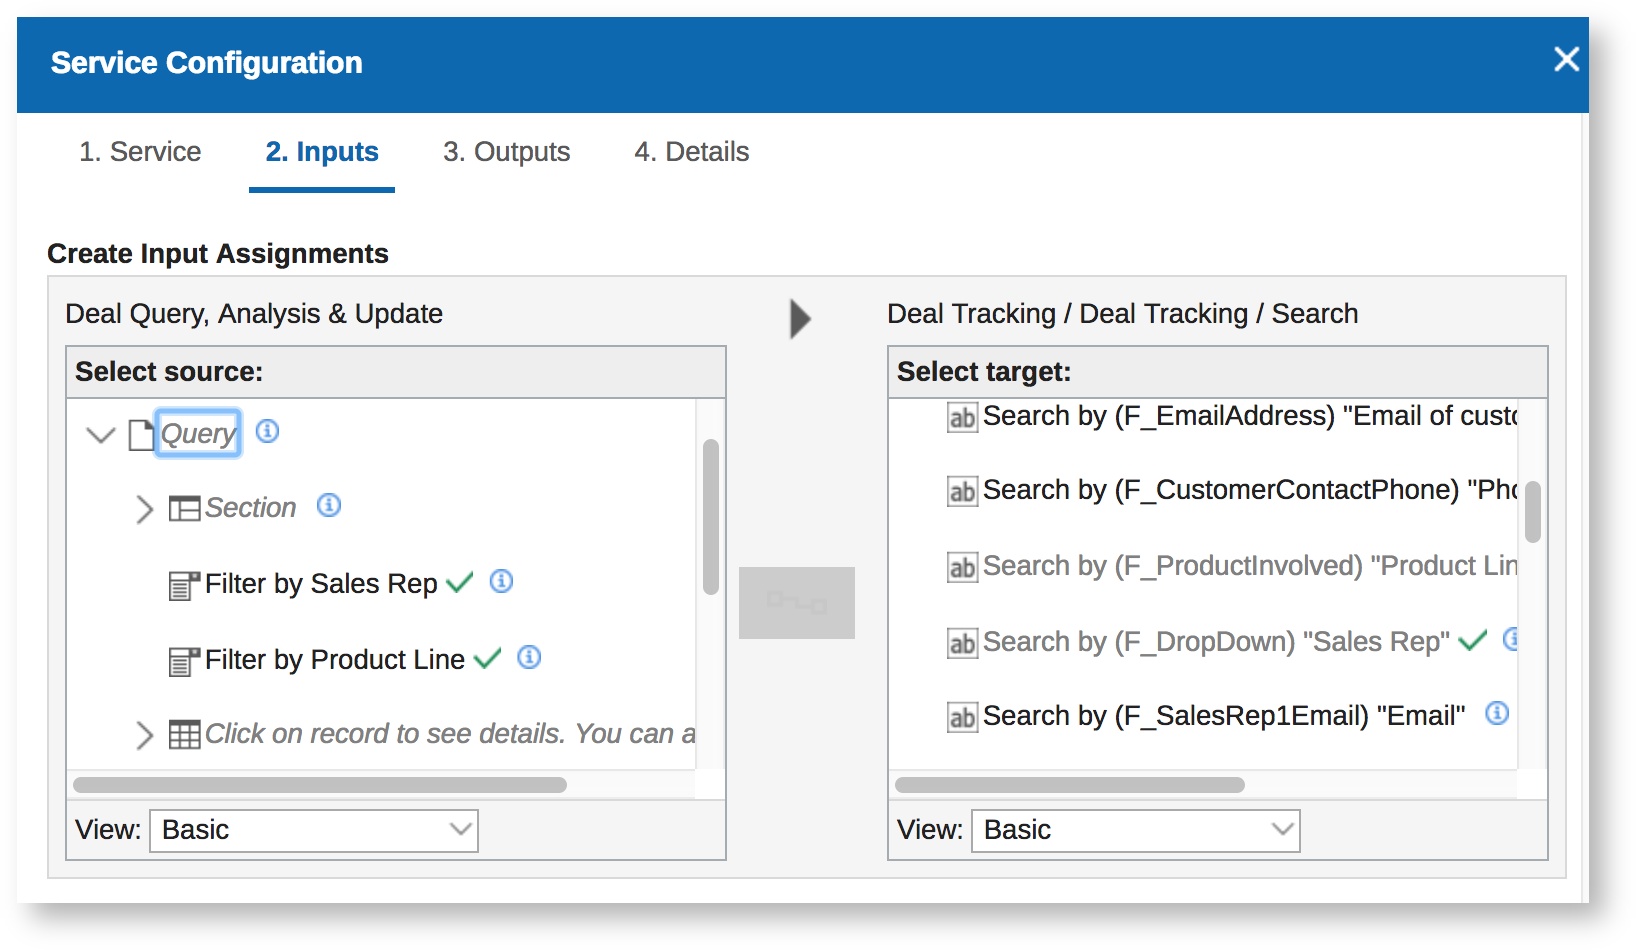
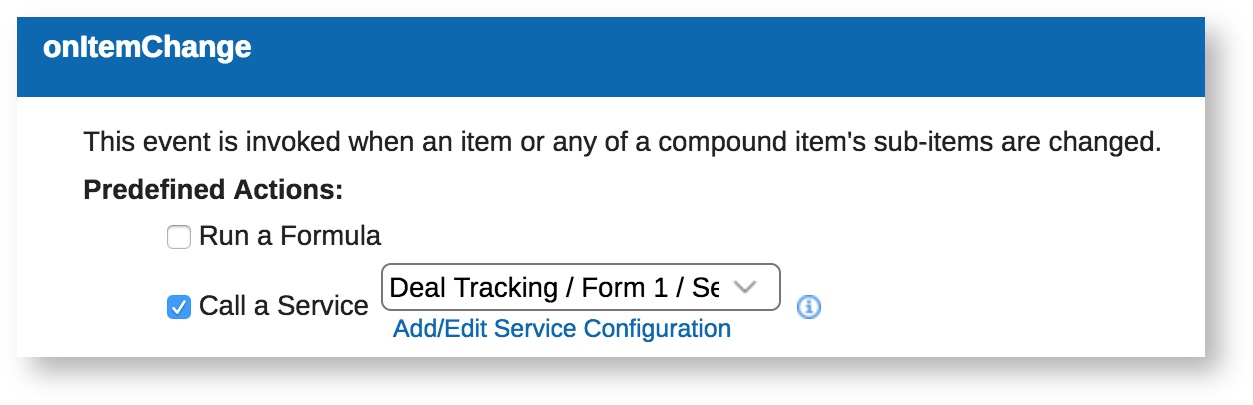
- Add the search service to the onItemChange events for each drop down. This allows you to dynamically change the search criteria and filter the list.
Hide the Add / Change Delete icons from the Table
- Do this by selecting No Buttons in the Advanced section of the Table properties.
Pass the selected Record ID value to the Form
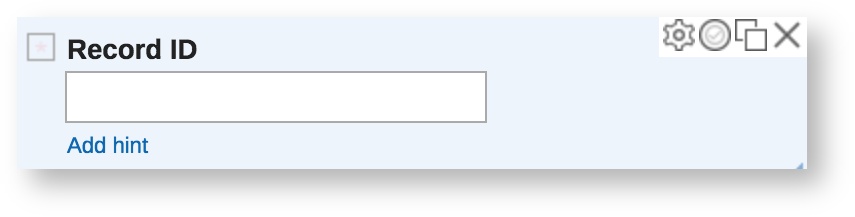
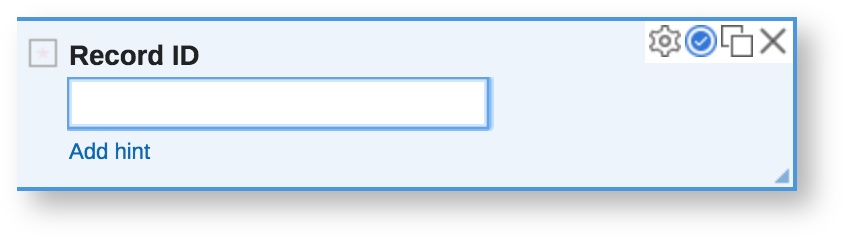
- Add a field to the form page called Record ID. This field will receive the ID of the selected record.
var selected = item.getSelection();
if(selected === null)
   return;

BO.F_RecordID_Form.setValue(selected.F_RecordID_Table.getValue());
- Replace the with the RecordID ids in the code with the ids from your form page and table. You can do this by using 'shift space' in the Custom Actions box and selecting the fields.
Retrieving the Selected Record
Once you have the selected record ID you can easily retrieve the record from the database.
- Create some additional fields on a second page of the form to receive the data from the record that you will retrieve. This could be a subset of the records fields or all of them.
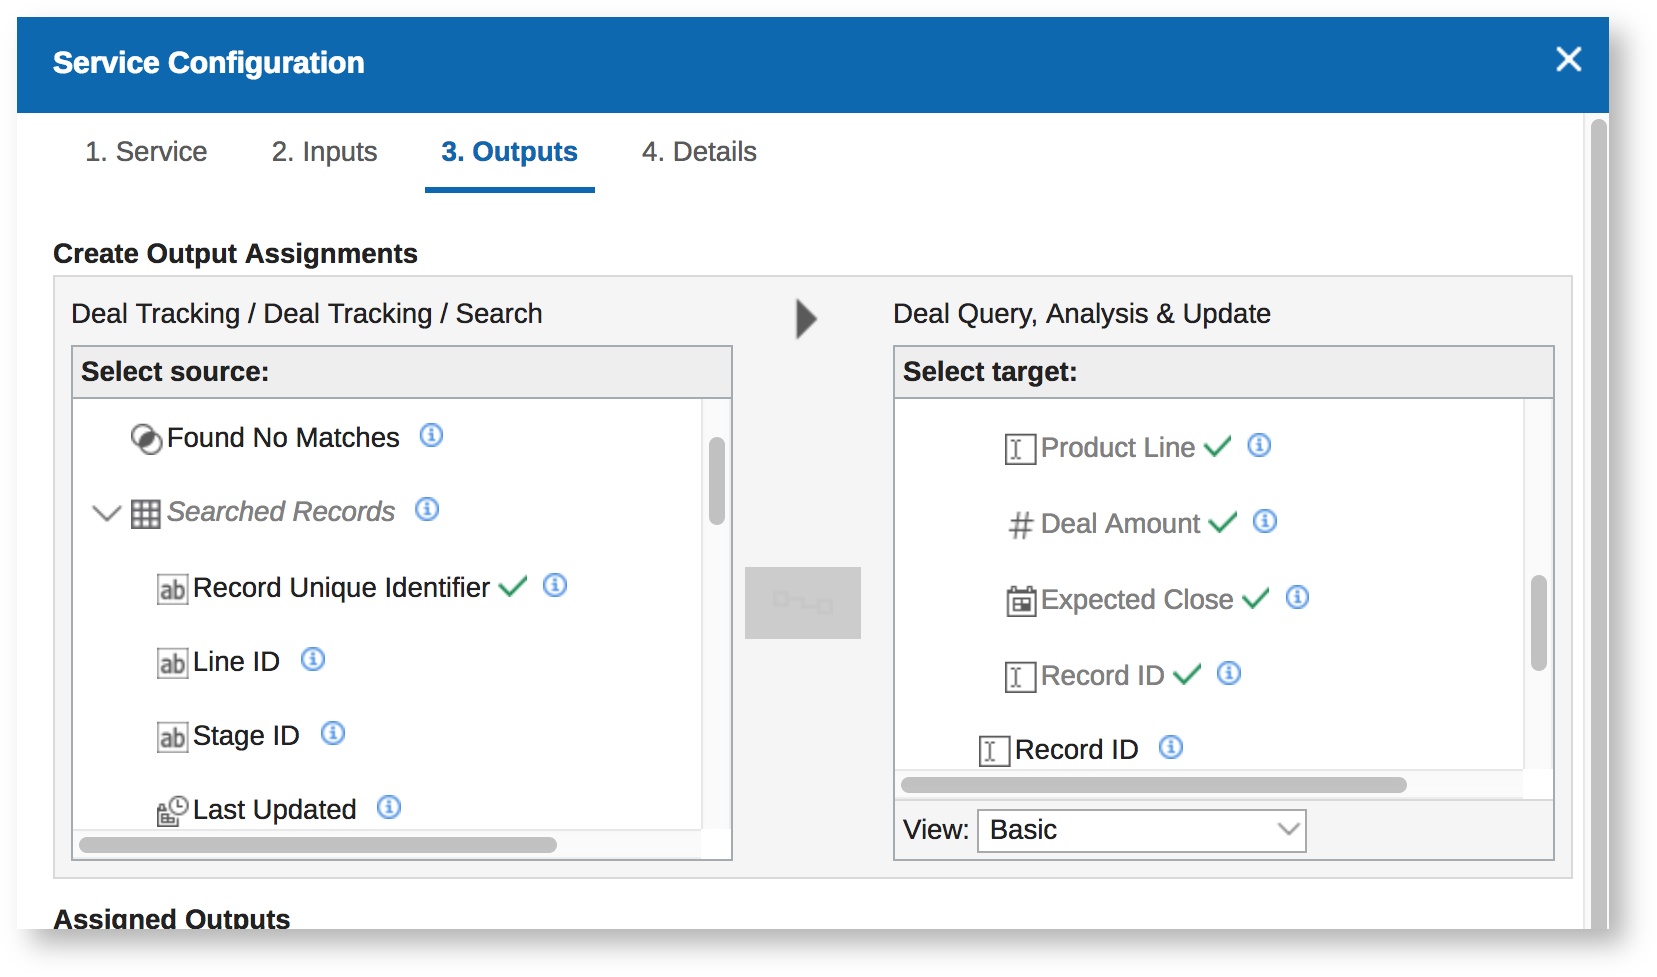
- Create a retrieve service and use the Record ID field on the form page as input.

- Map the output of the retrieve service to the fields in the first step of this section.
- Add the retrieve service to the onItemChange event of your Record ID form page field.
- Add this line of JavaScript to the onItemChange event of your Record ID form page field.
form.selectPage("P_NewPage2"); //Make sure you replace the value of P_NewPage2 with the id of your second page.
- Set a rule to your Record ID form page field. You can do this in Stages by clicking the "eye" icon next to the field.
Preparing your Leap Database for Updates
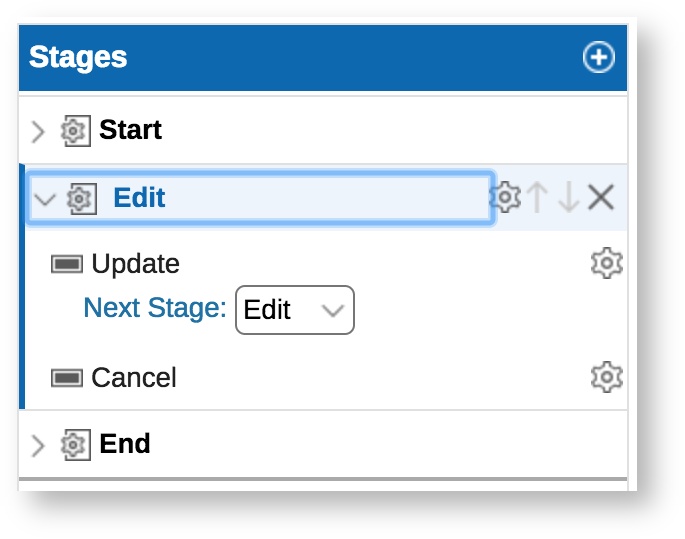
It is important to know a little bit about stages in order to do this. By default every Leap application has a Start and End stage. Once records are submitted, they by default go to the End stage where they can be read but not updated. The way around this is to add a new Stage – say called Edit – and set the form permissions for this Stage so that it can be updated.
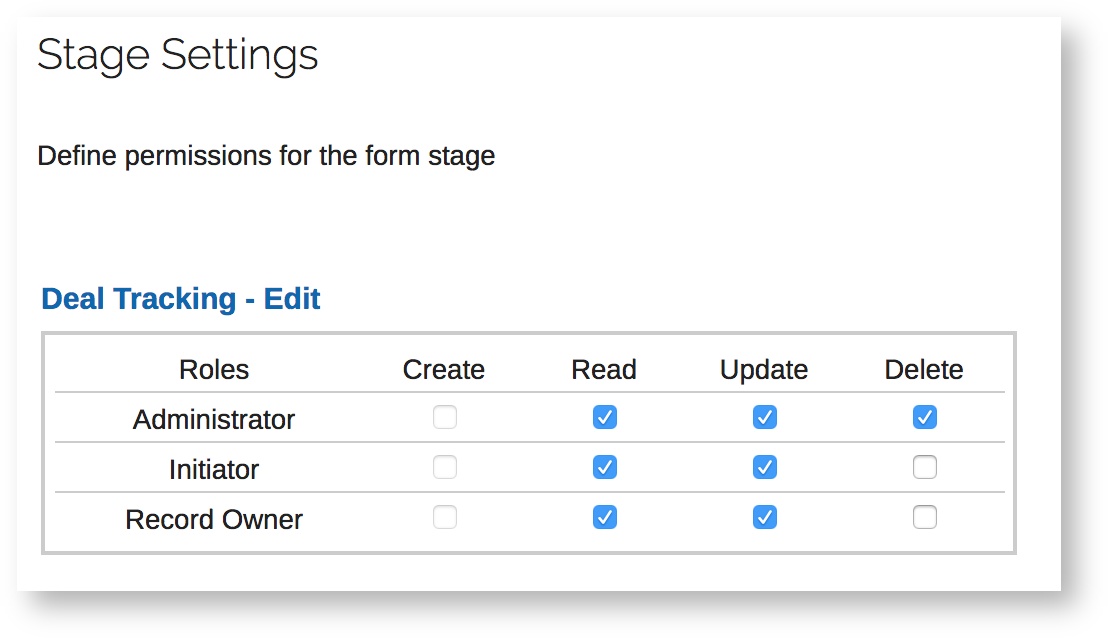
Have the Start Stage point to Edit and have Edit point back to itself. You can always add another Action to the form in the Edit Stage called End and then have this Action point to the End Stage if yo need it.
Alternative Update Approaches
So once your database is setup correctly... how do you update the record you select in the first part of this document? There are two ways:
The first approach is to open the selected record in application where it is stored. This requires that you build the record's url in JavaScript and then set a link field on the form to it. You already have the record ID so this is not difficult. More on this later.
The second approach is to make updates on the data in your second application and then send the data back to the original database via an update service call. This is what the Deal Tracking application does.
Open and Update the Record in the Database where it is Stored To open the record in the database requires that you build the url. This requires the Form ID and the Record ID. The Record ID is known from the table selection. The Form ID can be determined by using the app.getForm(); function. Together this gives us everything we need to build the url and set the value of an HTML Fragment
Below is an example of some JavaScript which you can put in the Record ID field on the page onItemChange event. It will build the url and set the link value of the widget.
var LeapServer = 'Leap Server domain'; //make sure this is set to your Leap domain - i.e. http://leapsandbox.hclpnp.com
var LeapApp = 'the rest of the url'; // to open the app you want to update -i.e. /forms/secure/org/app/00bcd642-97d9-4573-8b1c-2b94db237548/launch/index.html?form=F_Form1'

var RecID = item.getValue();

var URL = LeapServer
+ LeapApp
+ '&id='
+ RecID;


page.F_HTMLArea1.setContent('<a href='+URL+'>Open Selected Record</a>'); // make sure F_HTMLArea1 is set to the ID of your HTML fragment
You can make updates to the record using this link. Your database must of course be set up to accept updates.
To suppress the browser warning on leaving the site (opening a new url):

Enter the following JavaScript in the Application onStart:
app.setSuppressWarning(true);
Make Updates with a Service Call
In some cases you may want to update the original record from a second form via a service call. The advantages of this are that you can create separate Leap applications for each part of a process. This allows for a modular approach which makes it easy to add, change and manage individual pieces of the solution.
For example – let's say we have a Leap application which lets a sales rep submit a request for a customer estimate. A member of the estimating team could then view and load data from a selected request record into a second form to work on the estimate. When complete - the estimate application - could then write information back to the original record and update its status. The update Action could also trigger an email notification to the sales rep to alert that the estimate has been completed.
- To do this you need to use an update service call to send any change you want to make back to the original record.
- The service should be tied to the submit Action in your second form or a custom Button.
- If the original record's database has been set up to accept updates you will see an update service for that database in the service list.
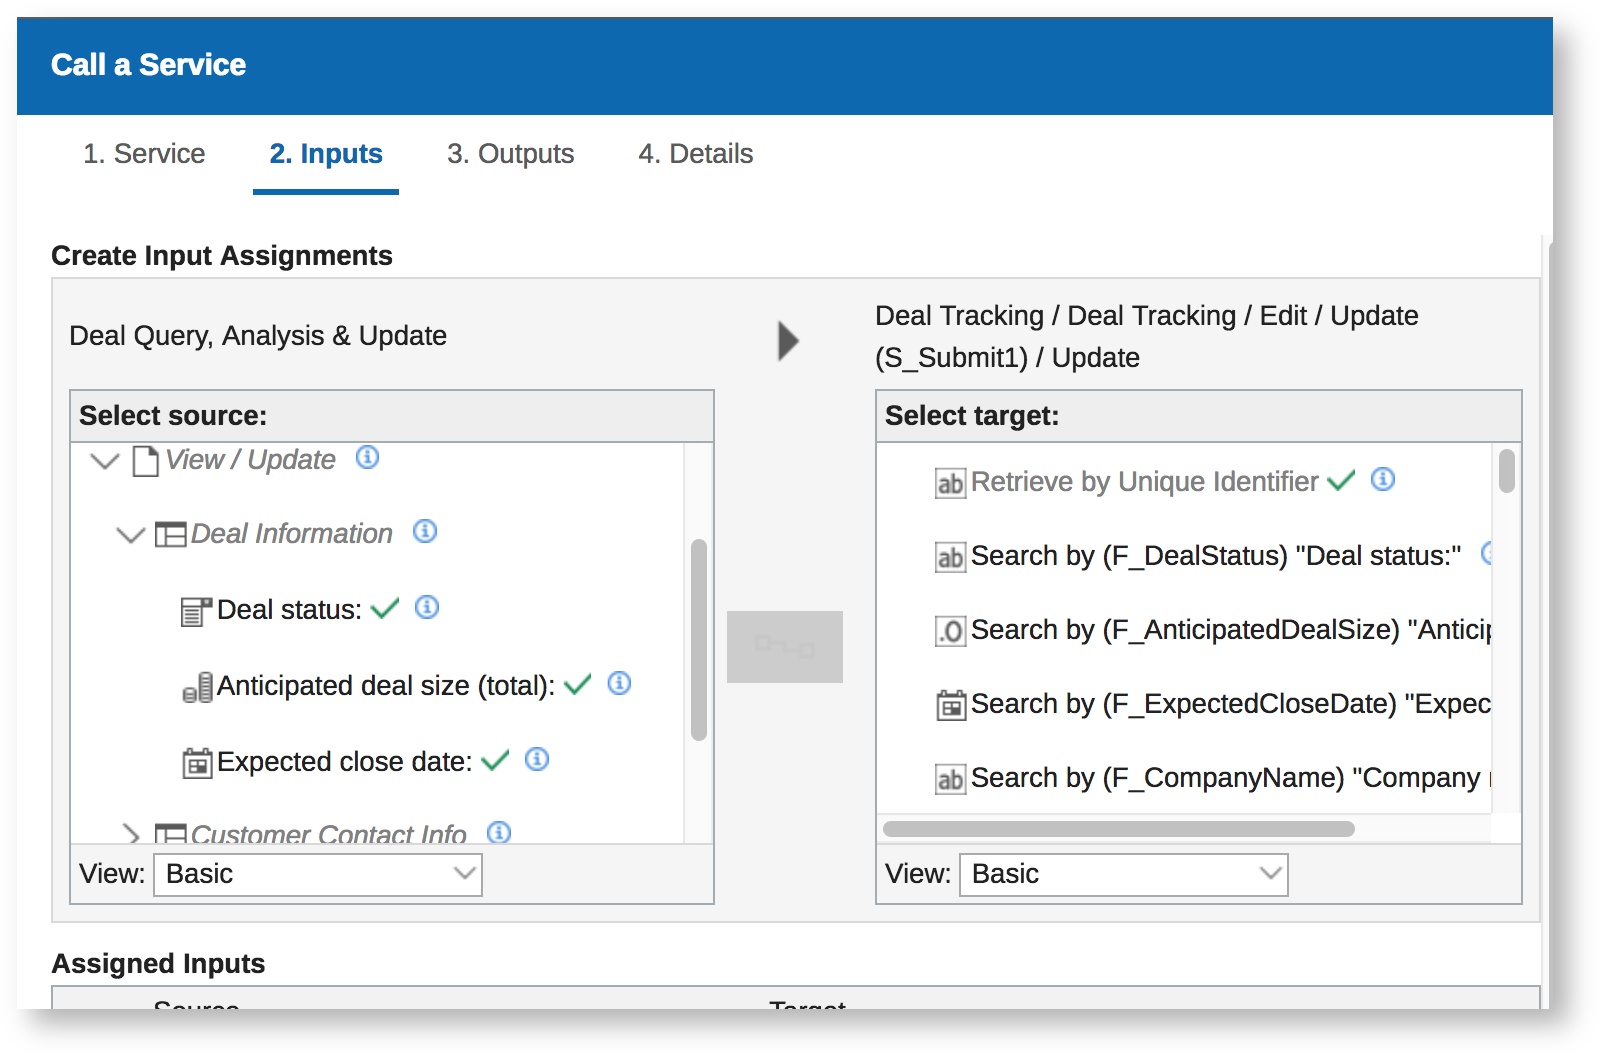
- Your update service will have all inputs. The first input you need to map is your Record ID field to the first option on the list labeled 'Retrieve by Unique Identifier'
- For the rest of your inputs skip down to where the labels start to say 'Update...'. Map your update fields to their counterparts in the database.
Add a Success Message Dialog
You may want to let your user know that the update was successfully done. To do this you can use the app.showMessage() function on the Update button onClick.
app.showMessage('Success', 'You Updated the Record', 'success');
This function produces a dialog that looks like this:

To take this a step further you could tie the app.showMessage function to a 'service listener' which executes the code when the update service has completed. This way it will only show when the service has successfully executed. An else condition could be added to show an "unsuccessful" message in the event the that the service call failed.
var srv = form.getServiceConfiguration('SC_ServiceConfig1'); //makes sure you set the ID of your Update service

srv.connectEvent("onCallFinished", function(success)
{
  if(success) {
    app.showMessage('Success', 'You Updated the Record', 'success');
  }
});