Dynamic Services - Leap REST API
- Marty Lechleider
The Dynamic Services feature, within the Service Configuration panel, gives the designer the ability to dynamically build a connection to any REST JSON service. Since the FEB REST API supports JSON we can even call our own API! Now why would we want to do this??? There are many reasons, let me provide a few:
1. The REST API provides more filtering options then the standard apps as a service offers. You can read more about these filtering options in our knowledge center.
2. Connect with services without having to manually create a service description xml file and deploy it to the server
This article demonstrates how to use the dynamic service feature to return a set of records between a start and end date. Now in the standard FEB service dialog we can only perform a date search with equals, before or after and by using the REST API we will be able search between two dates. I have created a very simple application that can be used to test this technique, the application contains 2 forms. The first form is the form that contains the "data" and the second form contains the UI that a user will use to search and display a set of records.
GetRecordsbetweendates.nitro_s - Import this file (with data to keep the few Dec 2016 entries I created) to have a closer look at what was implemented and described in detail below.
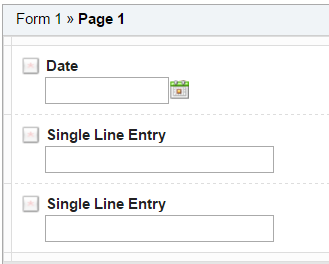
In the first form you can see just a few fields, the most important is the date field which will be my main filter criteria:
In the second form you can see all the parts that are needed to implement this special service:

Instructions
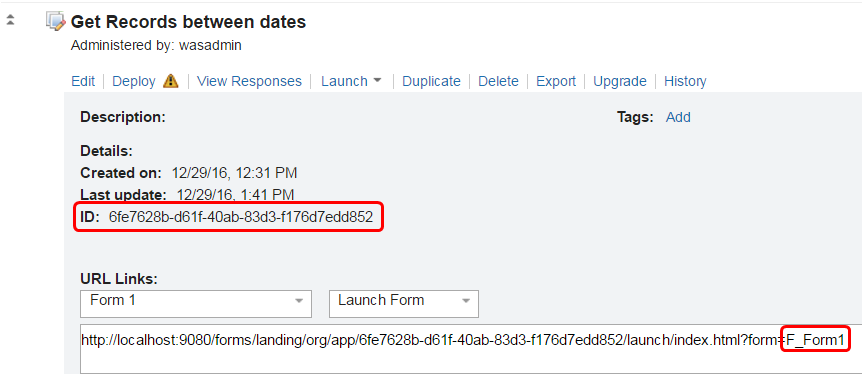
1. Identify the application that contains the data you will searching. Grab the app id and paste it in notepad (or other editor), in my example the app id is "6fe7628b-d61f-40ab-83d3-f176d7edd852" (you can get the app id from the FEB manage page, click the double down arrows to see the application details).
You will also need the form ID of the form that holds the data you are searching. You can also see this when you look at the application details. If you look at the launch URL "http://localhost:9080/forms/landing/org/app/6fe7628b-d61f-40ab-83d3-f176d7edd852/launch/index.html?form=F_Form1" the last part is the form id, copy it and add it to your notes you started in step 1.
2. In the form that is doing the search, you will need a table object to receive the results.
4. Make sure that your search form has two date fields and a Single Line Entry. The date fields will be the dates that we are searching between, the single line field will be the input to the service (we have to use some javascript to format the dates before we call the service.
5. Create a button to call the search service. In the onClick event add the following code:
BO.F_SingleLine4.setValue(BO.F_Date1.getValue().toISOString().replace(".000", "") + "A*N*D" + BO.F_Date2.getValue().toISOString().replace(".000", ""));
form.getServiceConfiguration("SC_ServiceConfig0").callService();
F_SingleLine4 is the ID of my single line field that is the input to the service. Make sure that you change this ID to the field that you are using (this is the field I had you create in step 4).
F_Date1 is the start date that we are searching between, update the ID to match what you are using in your form
F_Date2 is the end date that we are searching between, update the ID to match what you are using in your form
**Note everything else is required to get the date string in the correct format for the service call, if you get this wrong then the service will fail and the logs will show the error "ERROR 22007: The syntax of the string representation of a datetime value is incorrect."
Once the form is ready to receive the results we can build the service.
6. In your search form add a Service Configuration. Click on Settings, select the form that will display the results and click the Add Service Configuration button.
7. Select "Enter a URL" and click the properties icon. You are going to paste a URL like this one -> "http://localhost:9080/forms-basic/secure/org/data/6fe7628b-d61f-40ab-83d3-f176d7edd852/F_Form1?F_Date1__between=2015-06-01T07:00:01ZA*N*D2015-06-08T07:00:01Z"

This URL is the REST endpoint to the application that contains the data I am searching. If you are implementing this in a different application you will need to replace the app id with your app id and the form id with your form id. The F_Date1 is the ID of the date field that I am specifically using in my search, so you will need to update that to the ID of the date field in your application (where the data is). The part after the equals is going to be a variable that we are going to set, so include it but don't worry about it.
8. The method is GET.
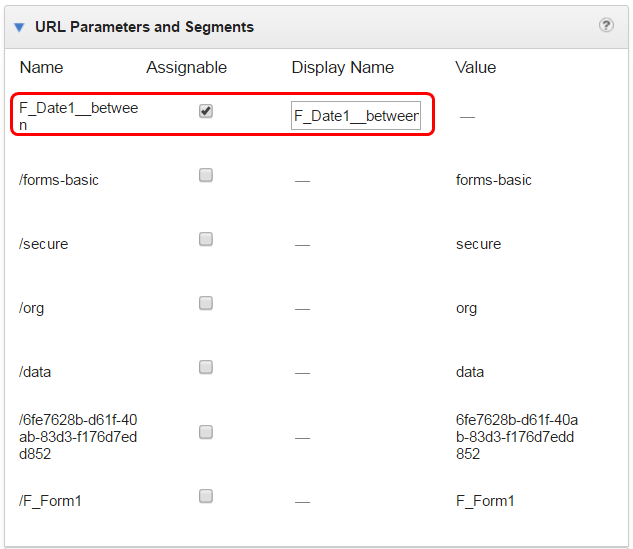
9. Several parameters will appear, in this sample the only one that should be "Assignable" is the one that starts with "F_Date...". I left the default generated name, but you can change the display name to anything you wish.
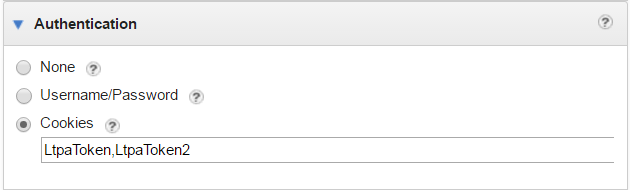
10. Set the Authentication to "Cookies" and set the value to "LtpaToken,LtpaToken2" (this assumes that you are using the default configuration of FEB and have not customized the token names within your WebSphere configuration, if you have then you will need to use those names instead).
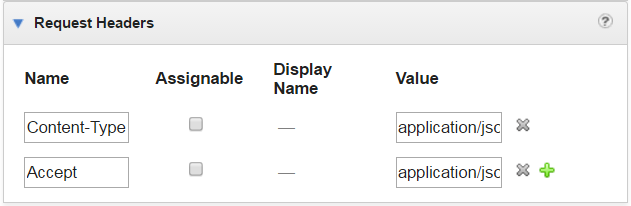
11. Create the following Request Headers -> "Content-Type" and "Accept" both with value of "application/json".
12. We are going to leave the Sample Response (JSON) empty for now.
13. Click OK. The service should resolve and you can now move on to assigning inputs.
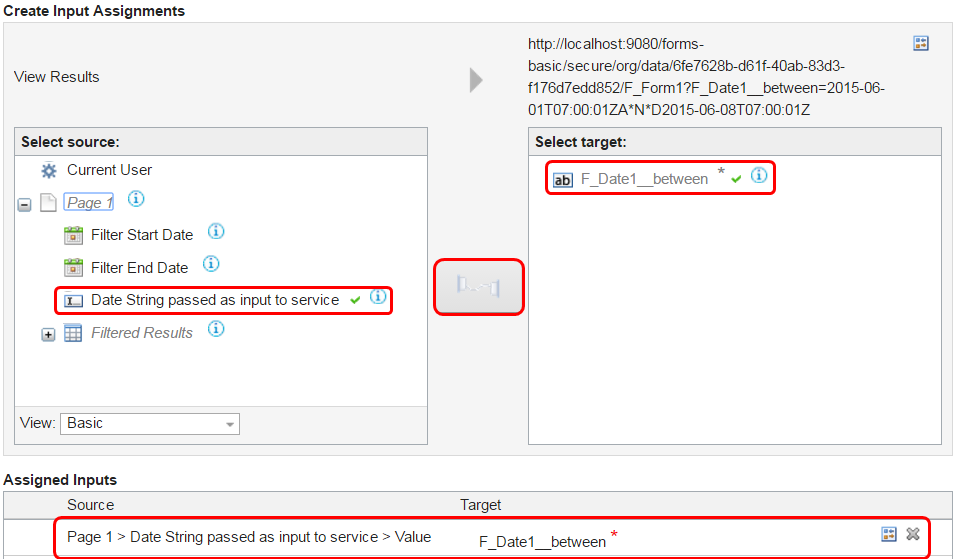
14. Connect the single line field to the "F_Date..." input and click Next.
15. We will leave the outputs unbound for now. Get the service ID from the Details page and then click OK to complete the service.
16. If necessary update the service ID in the onClick event of the button (copied in step 5) to the actual ID of the service you just created.
17. Save the app.
18. Make sure that your trace logs are enabled on the server with the trace string set to "com.ibm.form.nitro.service.*=finest", this will allow us to see the details of the service call which are essential for testing.
19. Preview the app, put two dates in the date fields (that you expect should return data, start with values that will return a small result set; one or two records) and then click the button. If you don't get any error then there is a good chance the service call was successful.
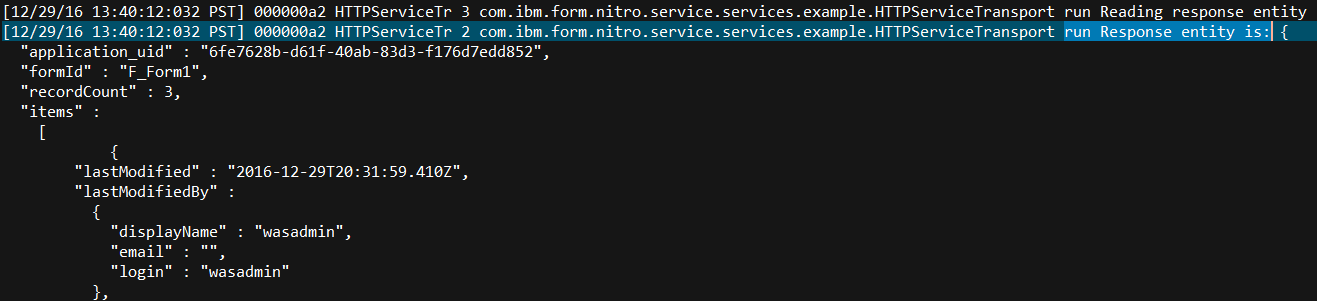
20. Open the trace.log and you are looking for a line that contains "run Response entity is:", if you find this in your log then all the content between the braces "{ . . . }" is the Response from the service and if you inspect it closely you will see your actual data using the date filter we specified.
21. Copy all the text from the opening brace to the closing one.
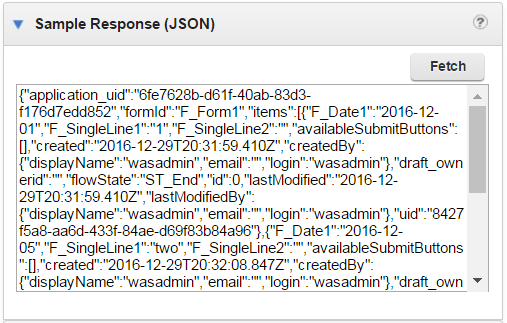
22. Edit your service configuration, click on the properties icon for the service URL and paste the copied response into the Sample Response (JSON) field and click OK.
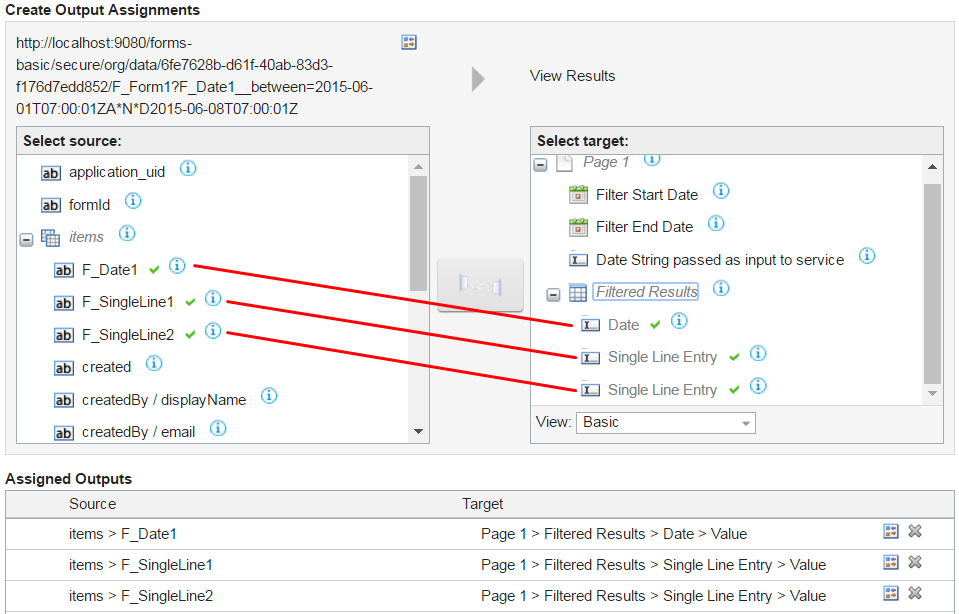
23. Now go to the Outputs tab and you should see all the fields from your data form. Bind the fields that you are interested in to your results table.
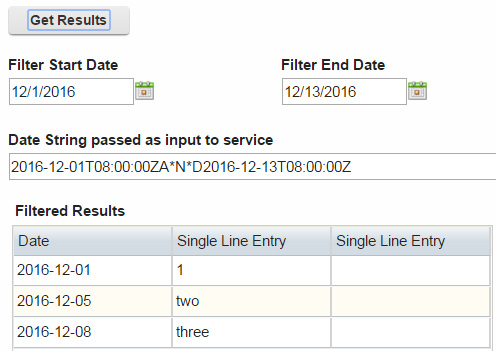
24. Now test your form and you should see your results appear in the table! Make sure that you have submitted some of the data forms with different dates so that you have something to return.
This is just a scratch on the surface of what you can do with this dynamic services feature. From here you can tweak how/when the service is called or what part of the results get displayed in your search form. You can also go back and add more filter parameters to the URL, they will appear in the parameters section and once marked as "assignable" you will be able to link them to fields on your form.
I hope that you have found this helpful, got any other ideas but not sure how to implement them? Post in our forum and I'll help!