Canvas Grid
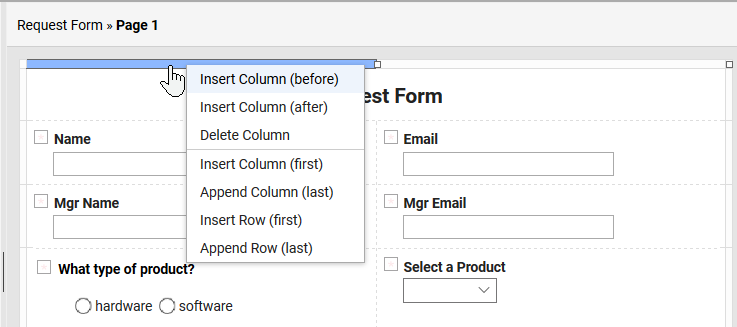
The layout of the canvas can be modified by clicking on the outer edge. You can insert, append or delete columns and rows to suit your desired layout. The new column or row will be added relative to where you clicked on the outer edge.
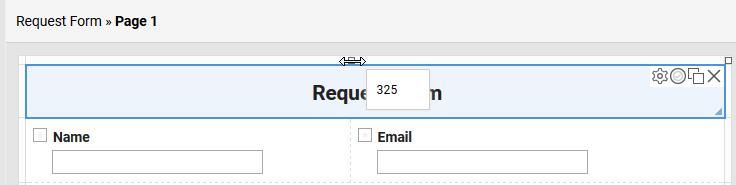
Columns may be resized by clicking on the white square and dragging it in either direction. As the mouse is moved a label will appear showing the current width of the column.
Items may fill more than one cell of the grid. Click and drag the triangle in the lower right corner of an item to span multiple rows or columns.

Forms Settings
There are a few high level form settings that are not well known that can make a big difference to what you build.
Label Alignment
Label Alignment defines where field labels will appear. The default is above the item, but you may also choose left or right.


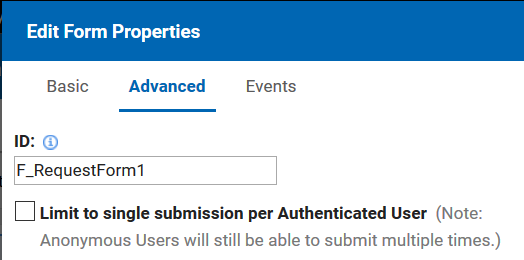
Limit 1 Submission Per User
Enabling this property will ensure that an authenticated user may only submit one instance of the form. If a user has already submitted the form, when they visit the base URL their previously submitted form will be loaded (provided they still have read access).
Change Submission Behavior
Changing this property can make a big difference to how your application functions and you make see this leveraged in examples posted on this Wiki. The content for the success message is defined in the properties of the submit button that is clicked. Note: If you delete the submit message then no message will be shown.

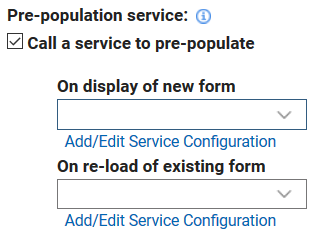
Call Service to pre-populate Form
Using a service can be a great way to leverage the corporate directory to pre-load information about the current user (i.e. name, email, manager, etc).
Page Settings - Responsive Layout
If you would like your form pages to be responsive, for displaying on various sized screens, then you will need to define the parameters for the behavior in the page settings.
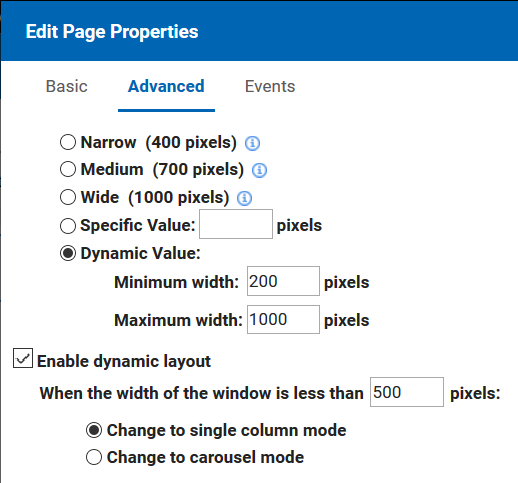
You must define a minimum and maximum page width and you must also enable the dynamic layout. You must also set the threshold where the layout will switch to either single column mode or carousel (shows 1 question at a time).
Managing Apps
What is a .nitro_s
When an application is exported it will be bundled with the extension nitro_s. The file is a compressed package that contains the application definition (.xml file), files attached during the design process and all submitted records in XML format.
Note: If you have a nitro_s file you can use a compression tool like 7Zip or WinZip to extract the content.
Importing/Exporting Apps
Applications may be imported or exported from the Manage page. This enables you to migrate an application from one environment to another. If you want to move an applications submitted data check the include data option when exporting and importing.
Upgrading Apps
If you have multiple environments, let’s say a development deployment and a production deployment, you can make changes in the lower environment and then deploy them to production. Every application has an Upgrade option, click the link, browse to the .nitro_s file. If you want to overwrite the data (and the export contains the data) then click the option to update data. When an application is updated, its app id does not change. Even though you may make changes directly on the server and deploy them, if you have built a complex application it is recommended that you modify and test the application in a lower environment and then migrate to production.