Using Services to Delete Records
- Marty Lechleider
- Christopher Dawes
There a four ways that you can delete records (form submissions):
1. Delete all the submissions when you deploy the application. Click on the Advanced tab and check the check box to delete all previous submissions.
2. Delete records one at a time from the View Responses page.
3. Call the REST API to delete records programmatically. See the REST API documentation
4. Call the Delete service from within your application.
This post is to discuss how the Delete Service Configuration works within your application. It demonstrates two different ways that you can use the Delete Service.
Demonstration
How it works
1. Delete All the records that match the specified input criteria
The delete service call will delete all the records that match the specified criteria. This is an easy way to delete multiple records within your application.
2. Delete individual records by their RID.
1. When you click the delete records button we copy the RID of first row of the table into the temporary field, then we call the delete service where the RID field is the only input.
//set the global variable to 0 (this is done in case the operation is performed multiple times in one session)

app.getSharedData().curRow = 0;

//copy the RID to the temp field and then call the service
var tbl = BO.F_Table1;
BO.F_SingleLine6.setValue(tbl.get(app.getSharedData().curRow).F_RID.getValue());

//call the service to delete the RID
form.getServiceConfiguration("SC_DeleteByRID").callService();
2. In the onForm load there is a listener that waits for the delete service to complete. Once completed it increments the global variable that keeps track of the row being processed, then copies the next RID into the temp field and calls the service again.
//define the global variable that will keep track of the row being processed

app.getSharedData().curRow = 0;


var srv = form.getServiceConfiguration('SC_DeleteByRID');
srv.connectEvent("onCallFinished", function(success)
{
  if(success) {

    //increment the row counter
    app.getSharedData().curRow++;

    //if there are more rows in the table
    var tbl = BO.F_Table1;
    if(app.getSharedData().curRow < tbl.getLength()) {
      //copy the new RID to the temp field
      BO.F_SingleLine6.setValue(tbl.get(app.getSharedData().curRow).F_RID.getValue());

      //call the service to delete the record by RID
      form.getServiceConfiguration("SC_DeleteByRID").callService();
    } else {
      //clear temp RID field
      BO.F_SingleLine6.setValue("");

      //at the end, refresh the table with the items that remain
      form.getServiceConfiguration("SC_GetDataRecords").callService();
    }

  }
});
3. This process continues until all the rows in the table are deleted and then it calls the search service to return the rows that are left in the data form (this will be all the rows that the user manually removed from the table before clicking the delete button).
Enhancement 1 - Changing the mouse cursor to the spinning wheel
When performing operations like this it is a good idea to give your audience some indication that something is happening, otherwise they may start taking actions that we don't want (like pressing the button again, refreshing the page, etc) which may interrupt or cancel the action. The first enhancement is to use a custom CSS class to change the mouse cursor from the default arrow pointer to a spinning wheel.
The look of the spinning wheel differs between browsers.
1. Create a new file, waitCursor.css
2. Copy the content into the file:
.lfMn .wait_cursor,
.lfMn .wait_cursor * {
    cursor: wait !important;
}
3. Add the file to your application...Click the Settings tab...then click Files in the menu on the left.
4. Click on the Style tab and select the css file from the "Customize your theme with additional CSS" dropdown.
5. In the onClick event of the delete button add the following JS, to enable the style when the delete button is clicked.
//change the mouse cursor to the spinning wheel
page.addClasses("wait_cursor");
6. Since at the end of the delete operation we refresh the table of records, we do not want to change the cursor back to normal until that operation is complete. To accomplish this we need to add an onCallFinished handler for the service that populates the table. Add the following code to the onLoad event of the form. This will change the cursor back to normal after the records have been deleted and the table refreshed.
var srv_gdr = form.getServiceConfiguration('SC_GetDataRecords');
srv_gdr.connectEvent("onCallFinished", function(success)
{
  if(success) {
      //change the mouse cursor back to normal
      form.getPage("P_NewPage1").removeClasses("wait_cursor");
  }
});
Enhancement2 - Adding a progress bar
The second enhancement is to add a progress bar that let's the user know where they are in the delete process. For this example I have chosen to implement a simple text progress bar, but one could build as fancy a progress bar as they like (i.e. using images, etc).
1. Add a Text item to the form.
2. Change the ID to something descriptive, I changed mine to "F_ProgressText".
3. In the onClick event of the Delete button add the following code, which will update the progress text item:
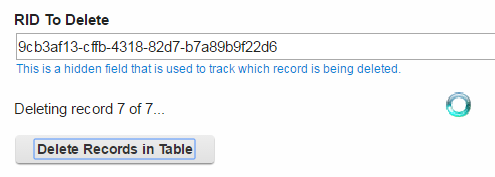
page.F_ProgressText.setContent("Deleting record 1 of " + tbl.getLength() + "...");
4. In the onLoad event of the form, find the onCallFinished handler for the "SC_DeleteByRID" service and add the following line. Note: I have cut out some of the content for brevity, you will only add the lines indicated by comment in the location specified below:
var srv = form.getServiceConfiguration('SC_DeleteByRID');
srv.connectEvent("onCallFinished", function(success)
{
if(success) {
. . .
if(app.getSharedData().curRow < tbl.getLength()) {
//update progress counter
form.getPage("P_NewPage1").F_ProgressText.setContent("Deleting record " + (app.getSharedData().curRow + 1) + " of " + tbl.getLength() + "...");
. . .
} else {
//clear temp RID field
BO.F_SingleLine6.setValue("");
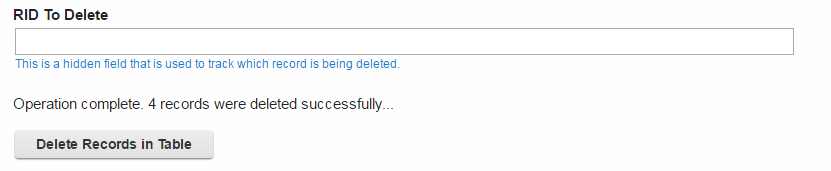
//update progress counter
form.getPage("P_NewPage1").F_ProgressText.setContent("Operation complete. " + tbl.getLength() + " records were deleted successfully...");
. . .
}
}
});